

Integrated Development Environments (IDEs)
Using Visual Studio
The full-version Visual Studio (not just Visual Studio Code) will greatly aid your development of C++ programs, like the final project. (Note that Visual Studio on Mac does not support C++, so this is just for Windows users.)
You can download and use Visual Studio Community Edition for free. Knowing how to use Visual Studio is a great job skill!
Here is a 12-minute tutorial on how to use Visual Studio.
When installing Visual Studio, select “Desktop development with C++” as shown in this figure.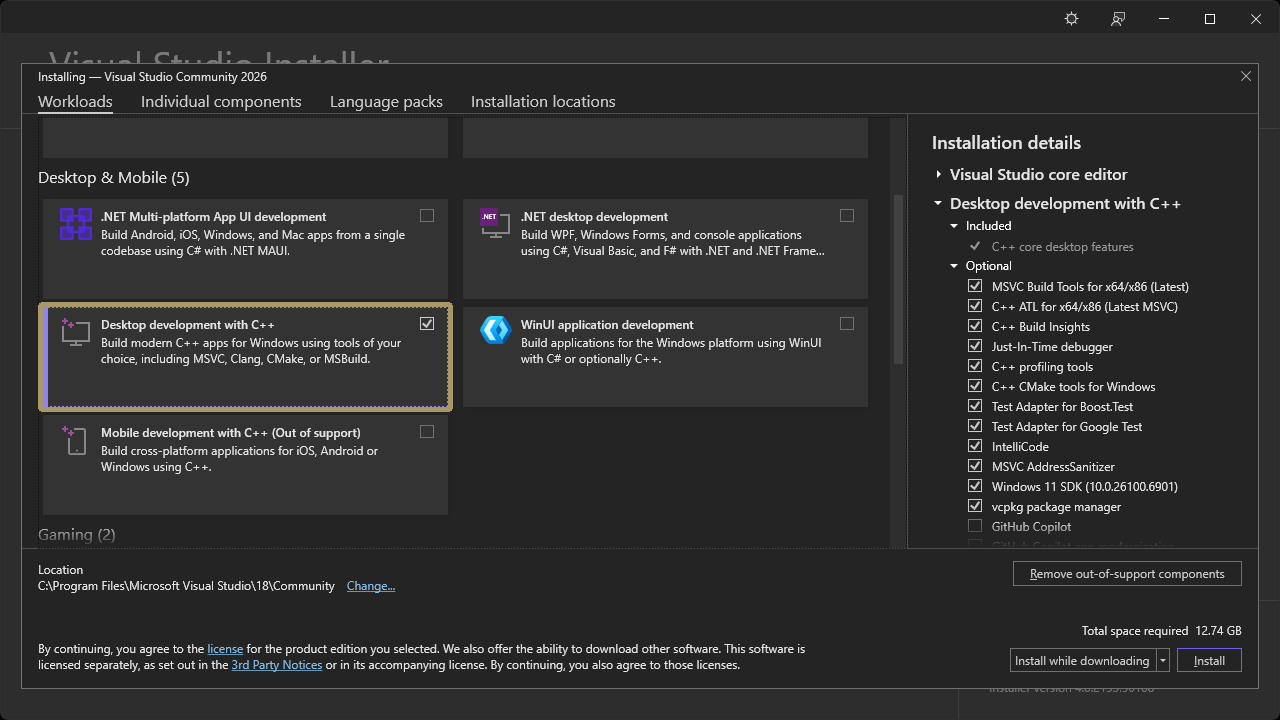
Quick tips for Visual Studio:
- Select an Empty (C++) project to start a command-line program.
- Use the built-in debugger (F5) to set breakpoints, watch variables, and step through code.
- Use CMake projects if you want a cross-platform build setup.
Xcode for macOS
Although there is a macOS version of Visual Studio, it does not support C++ development. The default for macOS is Apple's Xcode and the clang toolchain.
Install:
- Xcode from the App Store (or the Command Line Tools:
xcode-select --install) - Homebrew (https://brew.sh/) to install additional tools (cmake, gdb/lldb, etc.)
What students should learn (short checklist)
Whichever IDE you try, look up and try out the following task.
- Create and organize a small console C++ project
- Build from the IDE and from the command line (g++/clang++/MSVC)
- Use the debugger: set breakpoints, step, inspect variables